Xmas 2015

Copyright

I hope you enjoy reading this blog and find inspiration and ideas from what you have seen here but I would ask you to please respect my copyright and not use my pictures for publishing as your own work, or for entry into challenges.

Thursday, 25 August 2011

DL - landscape card

A friend of a friend is being honoured with the freedom of the City of London.  My friend wanted a congratulations card that somehow incoporated the logo and the Freedom ceremony.

 I cut two strips that were 4inches by 8 inches and one strip that was 4 inches by 10 inches.  I scored the last strip in each side at the 1 inch mark so that I could then glue the two side strips onto it.

This made a DL card, but opening landscape.  I embossed the front with the swirls embossing folder, and covered the join with spotty ribbon.  I embossed the greeting with the Cuttlebug onto the same white card and sprayed it with Crafters Companion spray and sparkle in silver.  This was stuck onto the front of the card using foam tape, over the ribbon.On the right hand side of the card front I used an EK Success punch along the edge, and stuck a black ribbon tab on the centre, with a brad.  

On the inside left cover, I used a downloaded copy of the logo cut out with a nestie label die to cover the join in the ribbon.  On the right hand side flap, I used promarkers to make a backing layer, and stuck onto that the Freeman's oath. 
Inside the card, I stuck an insert with a saying on it.  All three folded in to make a card that fitted a DL envelope perfectlhy!

Thursday, 18 August 2011

CD Sunday Challenge - Ovals

Everyone has their favourite summer flower and for me it's the poppy.  This image came from the Diary of an Edwardian Lady by Joanna Sheen - and came complete with it's own backing paper.  I didn't have the right colour red to make the layers, so used plain white card coloured with promarkers. 

The bow is made from organza ribbon, and was tied round the poppy paper before the topper was put onto the DL card.

I am entering this card into the CD Sundays Challenge - Only Ovals.

Friday, 5 August 2011

Birthday beefcake...

Today's card is a birthday card for a very vain 26 year old - the brother of one of my colleagues at work.

Techniques used are a combination of printing images snagged from online, a digistamp from Mo Manning that was coloured in using promarker skin tones, and embossing using the Creative Expressions brickwall embossing folder in my 'bug.

The base card was white, and I printed onto cardstock the England badge background.  This was then trimmed and put into the embossing folder. The brick edges were then highlighted using Cool Grey 1 promarker.

The brick embossed sheet was trimmed and the edges rounded off and then mounted on red mirri card.

More red mirri card was used to mount the happy birthday sentiment.
My strong man was shaped and then attached to the front of the "wall" using pinflair glue.  Finishing touches were the two flags that represented the family heritage.

Monday, 1 August 2011

In the garden

 I am entering this card into Sentimental Sundays - Challenge 66 and Polkadoodles week 30 challenge - in an english country garden

This card is a double twisted easel, incorporating stamping, colouring with promarkers and spectrum noir pens, die cuts and marbled paper.  It fits into a standard DL envelope.

The base card was plain white cardstock, measuring 8 inches square, and scored in half. I used marbled paper (marbled using the My craft studio marbling inks) for the base of the card.  The base was decorated with two swirls (cuttlebug die) and the stopper was white card with the edges distressed in shabby shutters, and matted with the same paper I used for the toppers.  A sentiment  from hero arts was stamped on the centre of it, and the two corners were a clarity stamp.

 Each of the easels were 4 inches square, with the corners rounded.  I distressed the edges using shabby shutters distress ink.  I then used a nestie to provide a shaped layer in complementary paper, and matted the two toppers onto that.

The first topper (on the left) was one of the free downloads from the Sentimental Sunday website, with the edges distressed using shabby shutters, and the flowers coloured using a mixture of promarkers and spectrum noir pens.

The second topper (on the right) was a sarah jane clear stamp.  I coloured the image in using a combination of promarkers and spectrum noir pens, and again distressed the edges using shabby shutters.  The small butterfly was from my stash.

I didn't put a specific sentiment on there - it can be a birthday, a get well, or just a thinking of you card that way.

Christmas Robin

I know, we are finally getting some warm weather!  But I had a fancy to play with some of my Sheena Douglas stamps and have a go at a card with no layers.  Scary!  I did have a plan, though.  If any of the colouring or stamping had gone majorly wrong, I would have layered another version over the top!

In the event, though, it all went well.

I did the stamping first, using a memento black ink pad - this was because I wanted to use my promarkers.  The sentiment was stamped in the bottom right hand corner.  On reflection, I think I could have got that a bit more straight, but it wasn't bad enough to have to cover it up!

The foliage stamp was used to create the effect of a tree.  It should perhaps have come further out - the bit the bird is sitting on looks a bit sad, but I didn't want to take anything away from the main image of the robin.

The background was shaded using a combination of faded jeans distress ink, and one of the big and juicy pads.  To get the moon, I used a mask made from a circle punched from a post it note .  I used the inkylicious blending dusters to get the light effect - I find I am a bit too heavy handed with the cut and dry foam...

I was pleased with the way the robin turned out.  My blending can be a bit hit and miss, to be honest.  I need to practice more!  My mum loves colouring and has it down to a fine art but I am more of a novice.

To finish it off, I stamped a greeting across the moon and then sprayed the whole thing with some silver spray and sparkle from crafters companion.

Saturday, 30 July 2011

She's leaving home...

A friend of mine has been wanting to downsize for quite a while - her 4 bedroom house was just too big now her children are all grown up and married with homes of their own.  Anyway, she finally managed to do it and has moved to a 2 bedroom ground floor flat instead.

I did her a welcome to your new home card, trying out the new Spectrum Noir pens (which I have to say, work perfectly with the promarkers I already have).  This card was made using a stamp I've had for years, plus some backing paper printed off from the MCS encyclopaedia cds onto card for the base.

The little bird was made using self adhesive peel offs - there are two sets, one outlines, and one outlines and centres in double sided tape.  I didn't have glitter in the colour I wanted, so I used the miniscule balls... I liked the texture very much.

The lace strip was made using a Martha Stewart edging punch, and the sentiment was printed out on the computer.

Tuesday, 26 July 2011

CD Sunday challenge - Dreams

The image for this one was taken from Joanna Sheen's Victorian Companion CD, as was the backing paper. 

Ordinary copy paper was used with a Martha Stewart edger punch to make the lacy "ribbon".

Just some Lines Challenge - easel cards

I like making easel cards, you get so much more to decorate! This is a twisted easel card made for Mothers Day, where the "mother" isn't actually your mother.
For this card, a pale green/grey base card was used and a topper from a sheet I had in my stash (It may have been from Hunkydory, or Sue Smith).

Quicky glue pen and glamour dust was used to enhance the flower on the topper.  The base of the easel was stamped with a swirl from Clarity Stamps, and some paper roses and leaves, made using punches.  The butterfly was stamped onto acetate and glittered.  So that the colour I wanted for the layer cards was matching, plain white card was coloured with promarkers.

Saturday, 23 July 2011

Passion for Promarkers Challenge - Sketch

I thought it was about time I joined in some challenges.  And since I love my promarkers, this one seemed a good one to start off with!

I made this card using the sketch provided.


The backing paper was from my stash, distressed at the edges with Faded Mahogany distress ink pad. The check and peach card were also from my stash. I cut some acetate the same size as the check card and stamped the corner with a swirl and attached it to the card with a brad. The flowers were punched, and a gem stuck in the centres. The bear was coloured with skin tones promarkers (I forgot to note the colours!) and was then cut out using the cuttlebug.

The lace is my standby paper lace, and the butterfly was stamped onto acetate and enhanced with gilding flakes.

Pretty in pink

Little girls like pink for some reason, don't they? I had to make a 6th birthday card for a colleague's grandaughter recently, and naturally the spec was for pink and glitzy.
This card is a twisted easel (my favourite style right now). I used backing paper and fairy images (body of fairy was decoupaged - but you can't see that in the photo) from Making Cards magazine, and pink glitter card to layer. I used a Wink of Stella clear pen to give the wings a shimmer.
I stamped the name on the glitter card and cut out the letters. The tag with "6" on it was made from the backing paper stuck onto glitter card with a large silver peeloff. The greeting was a peeloff stuck onto the glitter card.

Birthday turtle card

I often struggle with cards for children. And men...

I've had to do a couple of children's cards recently though - this is the one I did for the one year old. Of course, he won't actually have it - at that age it's more for the parents to keep in a box, isn't it?
This was a twisted easel card, made using plain white base cardstock. I used paper and topper from Making Cards magazine, and also some "googly eyes" from The Range. The flowers were punched, the small ladybirds were from my stash and the letters making up the name were stamped and cut out.
Because I wanted to match the colours, I used plain white card for the layers, promarked to the shade I wanted along the edge.
The sentiment on the base card was a clarity stamp, and I used peeloffs for the greeting on the front topper.

Sunday, 17 July 2011

New Baby Girl card

A colleague in work has recently become a father for the first time, and I was asked to make a card for everyone to sign. 

I had a bit of a mental blank at first, but finally remembered I had some clear stamps of small hands and feet - and a neat sentiment.

I used pink tartan as the background paper, matted onto a plain pink to provide a narrow border, and an ~A5 portrait white base card.  I used a small flower punch to make a pink "ribbon" for the bottom of the card, and used the flowers to make a similar border at the top.

The topper was made with a nestie label number 1 in the same pink as the base layer, and a nestie label number 5 for the centre which was stamped with the images.  Both layers were distressed with Victorian Velvet distress ink before being layered.  I used foam pads to add some height to the white label number 5. 

A small pale pink bow was used at the top of the base layer, and a strip of paper lace was used across the card underneath the topper where the final sentiment was placed, using pinflair glue gel.

There are also two embossed lines top and bottom of the base card, but it isn't very clear from the photograph.

Summer Crafting at Doncaster

I made a spur of the moment decision to go to this show yesterday - about a 380 mile round trip.  I must be mad!  Petrol cost me about £45, plus the spend when I was there... yup, mad.

But! I got some new polka doodles stamps and ultimate graphic paper (and what a star Nikky is!!! Full of tips and helpful advice)

I also got some labels five nesties with rubber stamps from the stamp man that fit them perfectly.  I got practically my mum's body weight in plain card (not mine - it wouldn't have fitted in the car *grins*) and a £10 goody bag from the create and craft stand.  This bag was really good value - included a multi purpose heat tool as well as a craft knife set, peeloffs, glitter, many 3 d embellishments, 3 packs of speciality papers and a big block of decorative card. Also as I am a club member I got an extra pack of goodies worth £4.99. 

After housework today I am going to play with my new stash.  Woo hoo...!!

Monday, 11 July 2011

Creative Expressions Calling Card Challenge

These are the basic materials to make this calling card (ATC) focussed card.
  
The base card was a hammered white card cut down to 6" by 6" size, with the edges coloured with Faded Mahogany distress ink.  On this occasion, as I wanted a heavier colour, I used a cut and dry foam pad.  If I had wantedthe colour to be lighter, I would have used an ink duster (from Inkylicious) as I find they give me a more delicate effect.

I used plain card distressed around the edges with Aged mahogany distress ink for the calling card.  Onto the centre I stamped a daisy flower, which was coloured with a combination of distress inks and water color pens, and around the edges of the card I used one of Clarity stamps (the swirl pattern).

The sentiment came (I think) from a Hero Arts stamp set.  In the centre of the daisy I put a gem. (It started as a crystal, but ended up a pearl!).

The other background layer was cut by a nestie, and using a paper from a Crafty Individuals background papers pad, Book 1.  The edges were distressed with the same coloured stamp pad as the base card.  I also used a strip of the cool stick on paper lace from Kars.

For the flower, I used a 2" six petal punch from Woodware to cut one shape, and cut two 1" daisy shapes from the Crafty individuals paper.  The edges were shaped and curled and coloured with the Aged Mahogany to tone in.  I then layered them up, ready to be used when the card was nearly finished.

TOP TIP - if you use the same paper for punching out flowers as the backing paper, you can ensure that the colours match.

First, distress the edges of the base card, which has been cut to be 6" by 6". I have used Aged Mahogany distress ink by Tim Holtz. Then put down the first layer. I have used a deep red textured paper with a shiny finish. This colour toned in with the faded mahogany distress ink, and provided a striking contrast.

I was only leaving a narrow edge on show in this paper, or I would have run it through the 'bug with one of my embossing folders - probably the lattice one from Creative Expressions, as that is one of my big faves at the moment. And you get a really cool effect with it on this paper! But as only a narrow edge would be showing it wasn't worth it.

The next step is to layer on top of the red card the decorative paper. 

For this, I chose a sheet from Life's Journey paper pad from K&Company. I've had the pad a fair while, so it might not be available any more...

I like to round the edges on my papers with the corner punch - to me it looks nicer than square.

I put the layer to the left hand side, so that my lace strip could go down the right hand side, showing the red through it.  Finally, I put the nestie shape onto the backing paper at a jaunty angle, using foam tape to raise it from the backing.

Next, I put the ATC card onto the nestie shape, also at an angle, and also using foam tape.

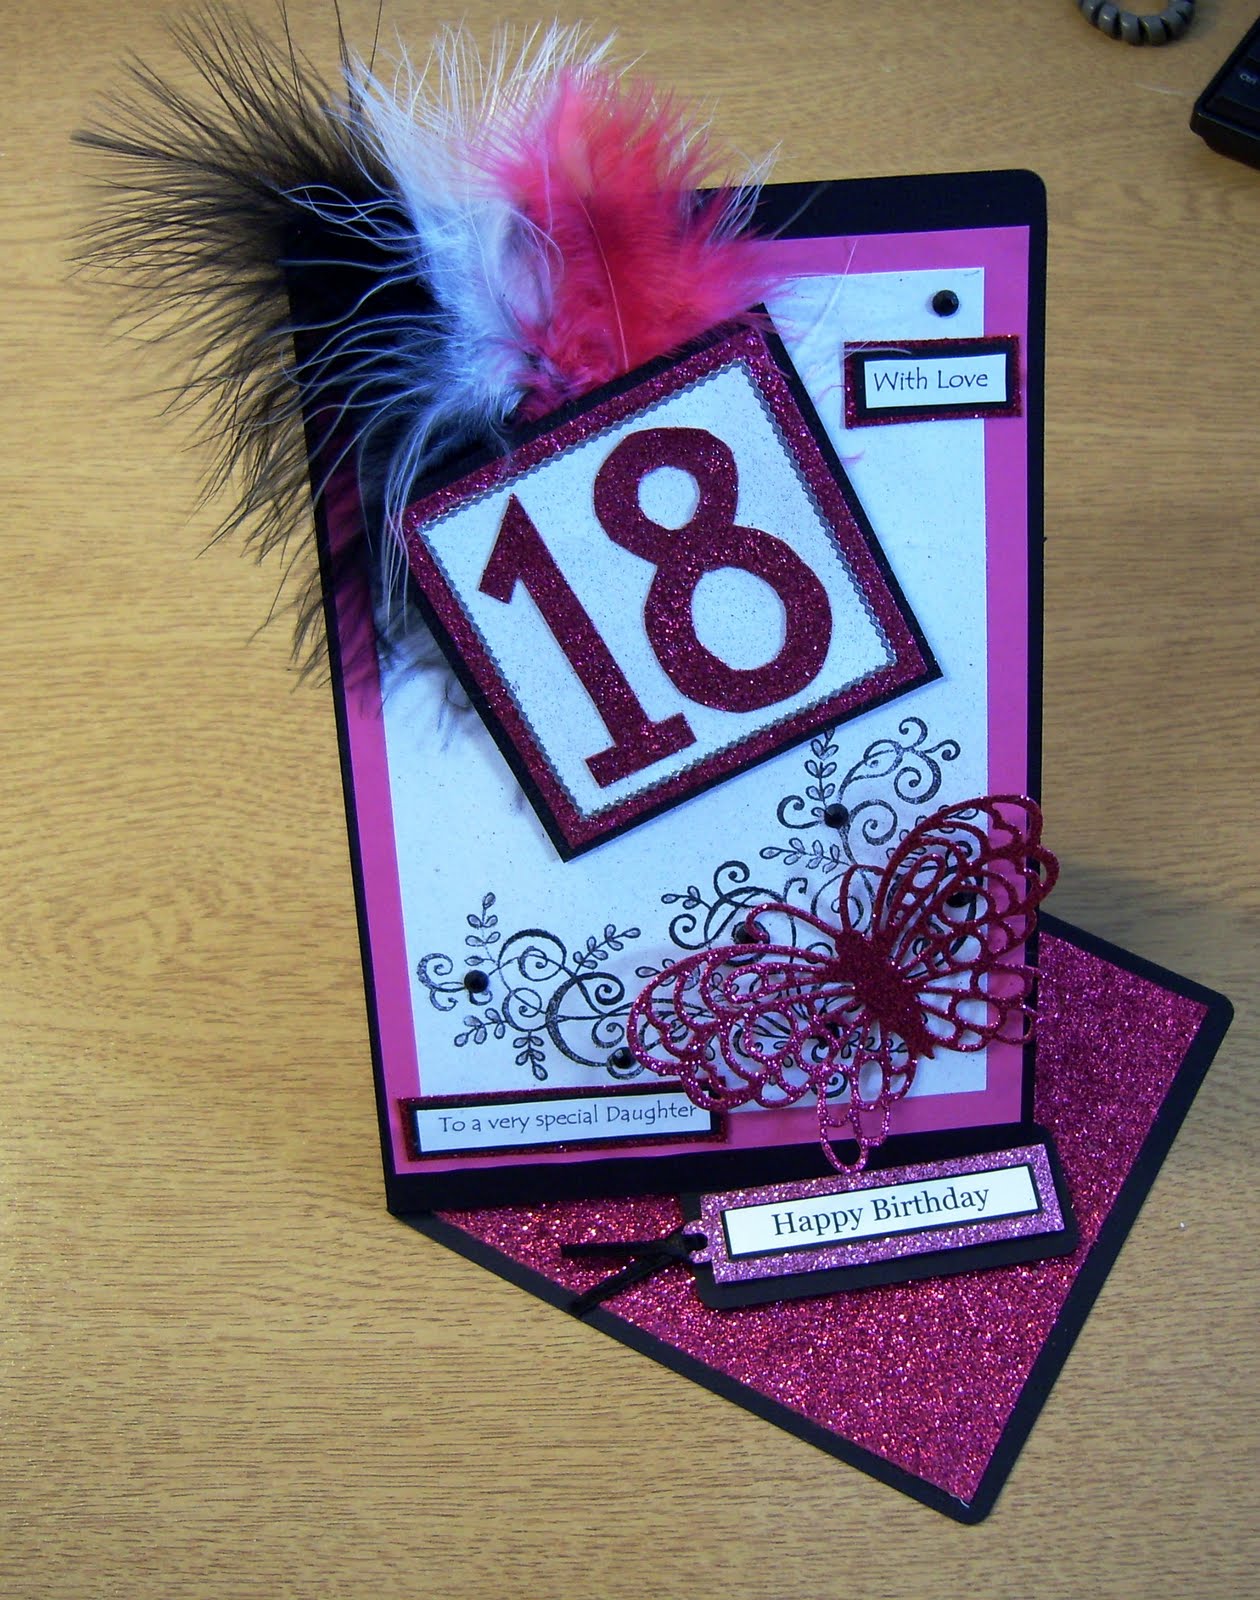
Finally, I put the flower onto the top right hand corner, and decorated the top left and bottom right corners with faux pearls.  As a final touch, there just had to be a butterfly in there - it's sitting on the leaf next to the flower!

Tuesday, 19 April 2011

Paper Roses

I have really got into making paper roses and other flowers lately. The only problem is that they can stand proud of a card, and I thought I would try to see if I could protect them a bit. These cards are different occasions - one a wedding and one a leaving card, but I used the same format. Both are A5 in size with an aperture bow front.
This was the leaving card, utilising brown and cream as the colourscheme. My trademark butterfly was diecut in cream and left plain.  The outside edge of the aperture was embossed using an embossing folder.

This is a close up of the flowers on the outside of the bow front. The rose on the inside is larger, and acetate protects it by being stuck inside the aperture.  The centre of the flowers were small amber coloured gems.


This card was for a wedding. The colour scheme was cream and gold. It is the same style as the leaving card, but I did include some additional embossing on the front, using cuttlebug embossing folders for the sentiment.  My butterfly was diecut from gold card.


Not all of the flowers for this one were hand made - the gold net flowers were bought from Hobbycraft.


The heart was embossed using the EaziScore board, and then outlined with border peeloff stickers.  The couple's initials were put in the centre of the two smaller hearts.

Friday, 8 April 2011

Birthday easel card


This was a birthday card ordered by a friend. She asked for pink and glitzy - and of course, I had to include my butterfly! Also included was a swirl stamp, with gems stuck on at appropriate points, and the sentiment was mounted on pink glitter cardstock. The background papers came from a My Craft Studio cd (Papercraft, I believe).

Wednesday, 6 April 2011

Exploding box

I was also asked to make an "exploding box" for a colleague's daughter when she was 18. I was again given a colour scheme of pink, white and black.

The pink panels were embossed with the cuttlebug swirls embossing folder, and all were edged with fine border peel offs. My latest passion for making paper roses and other flowers was indulged in and I was really pleased with the way the white pearlescent paper looked.


Because it was an 18th birthday, I thought it would be cool to include a key somewhere in there.


The "hinges" of the box were vellum, stamped with butterflies (that theme again!) and the inside of the box was decorated with photos of the birthday girl, supplied by my colleague. I understand that the present was to be placed inside this box (it was a locket).

18th birthday card

The theme - pink, black and white.

 This card was for a colleague to give to her daughter and she was very specific about the colour scheme.  I'm not into pink, especially the vibrant pink that she chose, but I was pleased in the end with the finished card.
The card was an A5 twisted easel card, I used a pink, black and white feather to put behind the "18" topper.  The 18 was cut from the pink glitter card used for the base.  I layered fuscia pink and black card and added white card that had been sprayed with the Crafters Companion silver spray and sparkle.  A swirl was stamped in the corner of the front of the card and a diecut Marianne Butterfly was used to give dimension.  I stuck gems coloured pink with promarkers onto the stamped swirl.
The greeting tag at the bottom was stamped on white card, then layered onto the pink glitter card and black card and applied using foam tape.

Saturday, 1 January 2011

And it came to pass...

I have other blogs, which I use to talk about life in general, but I wanted one to share my hobby of crafting specifically. So here we go! Isn't it pretty??

I've always enjoyed making things, and from a very young age have had a passion for pens. Very unusually for a child I began collecting fountain pens because I wanted them, not because I had to have them for school. And there is something about a shop filled with paper that I find almost irresistable...

So it was logical that my first crafting efforts would be calligraphy. I still like the art of pen and ink- but now it is only but one of the weapons in my armoury. In my crafting career, I have knitted, sewed (clothing, patchwork and cross stitch), crocheted, painted, made rugs, stencilled, decoupaged, made pottery, rubber stamped... and the list goes on. My main passion is for papercrafting.

I really wish I could pick just one craft and specialise - but I don't. Just like the butterflies I love, I flitter from one thing to another. And because of my pack rat nature, I collect and hoard all the necessary tools and equipment. There are a lot of crafting supplies in my house...

My plans for this blog are to post pictures of each card or project I make, along with a brief summary of what I used and how I did it. I will be posting historical pictures too - so I will probably have no clue where I got that paper from, or that stamp. But you have to begin somewhere, and it is interesting to see how my style developed since I got the crafting bug many years ago! Each post is dated when the picture was taken, so earlier projects will be before this entry.

Sunday, 24 October 2010

Christmas fancy


This card was one that we did in November last year at our class. I like cards that have dual purpose - and this one was an easel card with a cunning little box on the front to put recipe cards inside. As it was for Christmas, the recipes were for mincemeat, orange pastry, and mince pies. The picture of the art nouveau lady with the tree was from a Debbie Moore cd.